Tomato Crop and Garden Update for 5 July 2023
While the update from May was quite dismal owing to the effect of cold night time air from the North Pacific Ocean, we’ve seen explosive growth over the month of June for all of our crops.
If you don’t have time to read the entire article, the main point is that the local heirloom tomato variety, the Sebastopol, from the 1900s, is a winner for the coastal areas of Northern California where the mornings are cold and foggy. The popular Brandywine and Big Beef varieties also do well but the San Marzano and German Johnson varieties need to be protected from the cold, or transplanted about a month later.
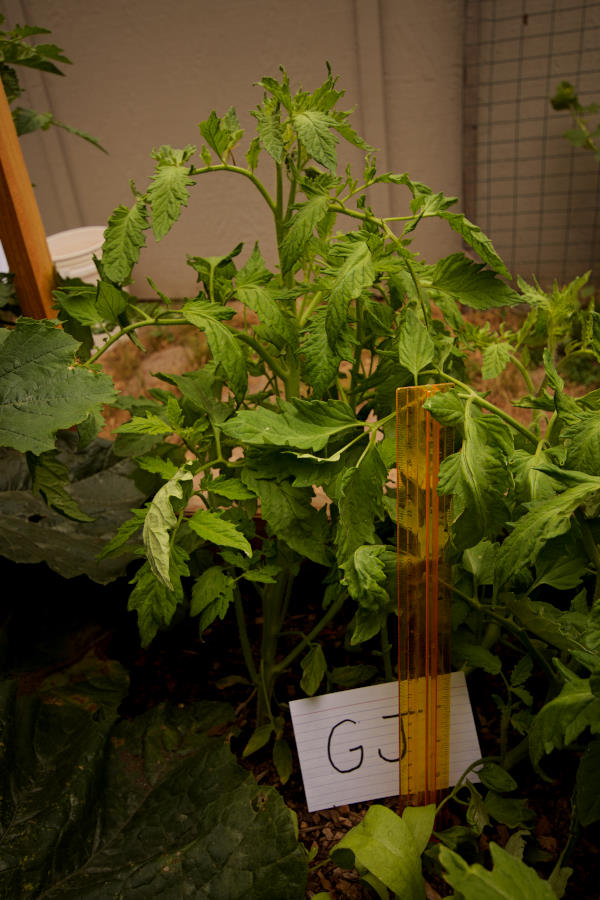
Growth of Five Different Tomato Varieties
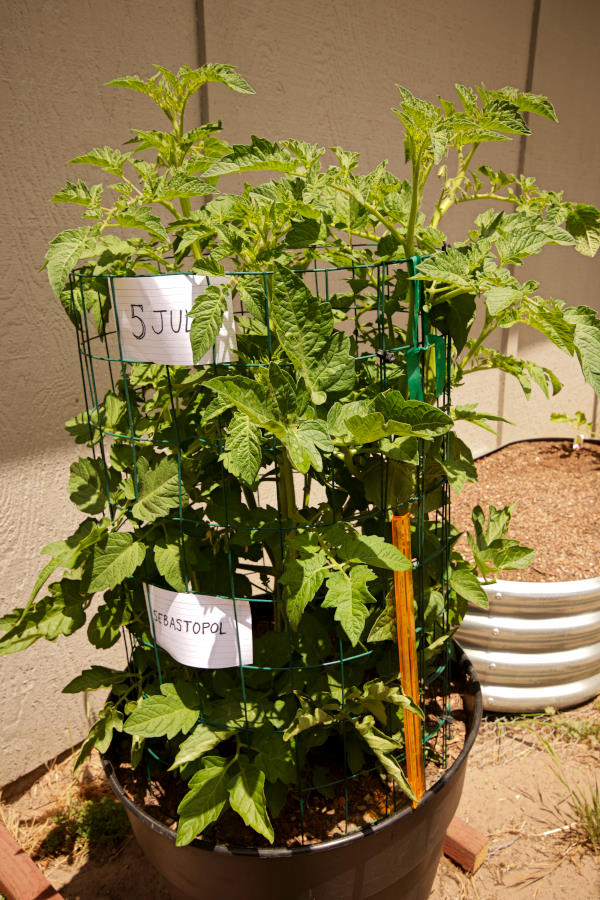
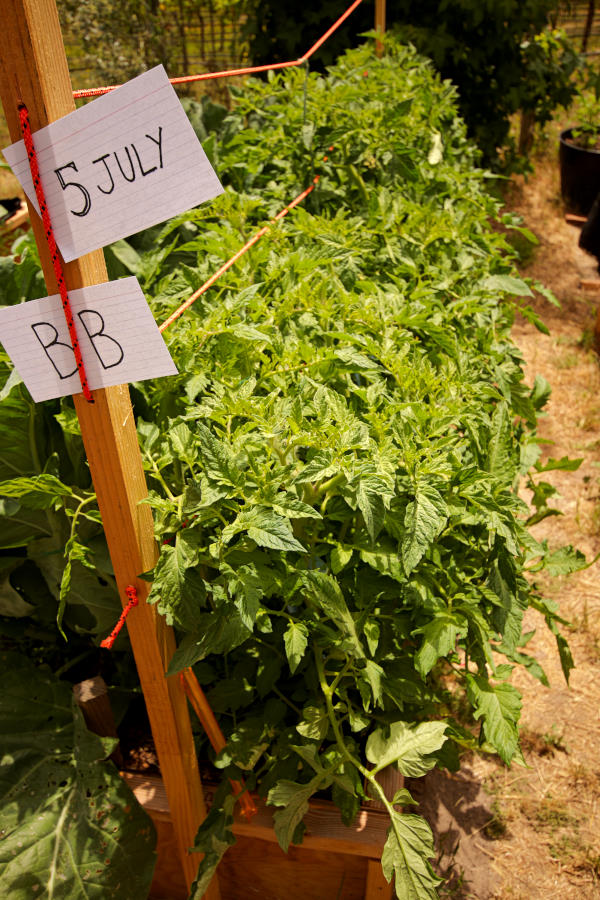
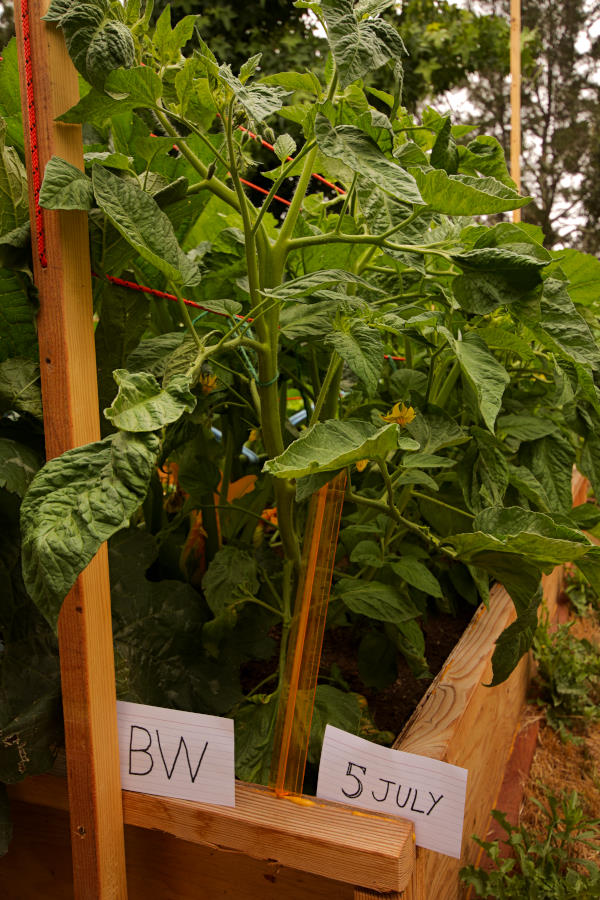
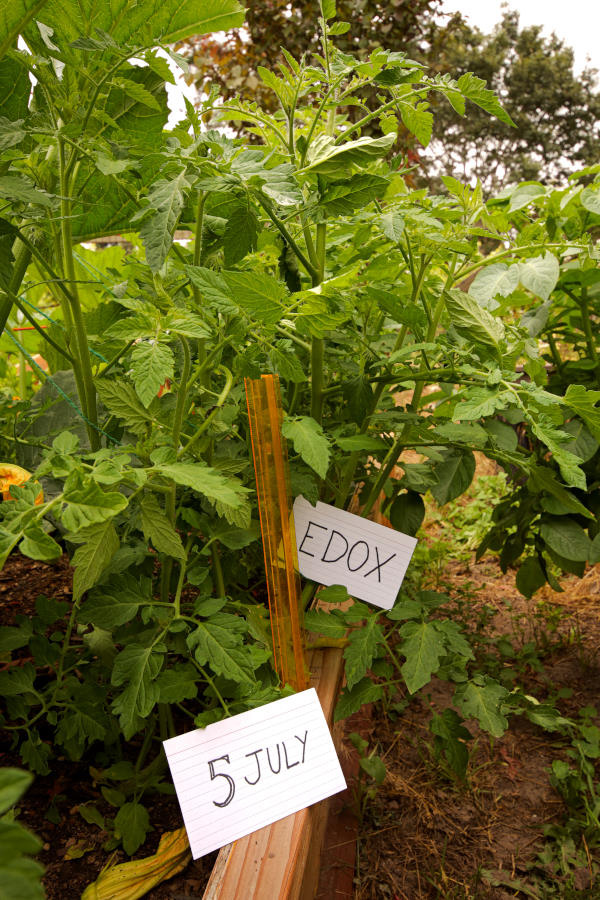
The tomato crop leader is a single plant of the Sebastopol variety, a heirloom indeterminate cherry tomato cultivated here in Sebastopol, Sonoma County, California in the 1900s. It’s suitable for our foggy, cool climate. We planted this one late in April as a store bought starter seedling that had been potted on and was 8” tall when we transplanted it. It’s now over 30” tall. I will definitely invest in a packet of Sebastopol seeds for next year. Second among tomatoes are the easy to grow Big Beefs who have passed 24” tall and have developed very thick stems. In third place by a hair are the easy to grow Brandywines which are over 20” tall, also with thick stems. One out of our seven Brandywines has been stunted by blight, yet seems to have recovered. In fourth place, the Edox hybrid cherry tomato plants have passed 24” when they get full sunlight, but only 17” where partly shaded. Their stems are clearly less robust than for the Big Beef and Brandywine beefsteak plants. In fifth place, the San Marzano plum tomatoes that had been hit by the cold morning chill of the North Pacific Marine Layer in April are lagging behind in growth, now 12” tall, yet showing every sign of a full recovery. Likewise, suffering the same fate as the San Marzanos, the German Johnsons, yet another beefsteak variety, are lagging at only 16” tall.

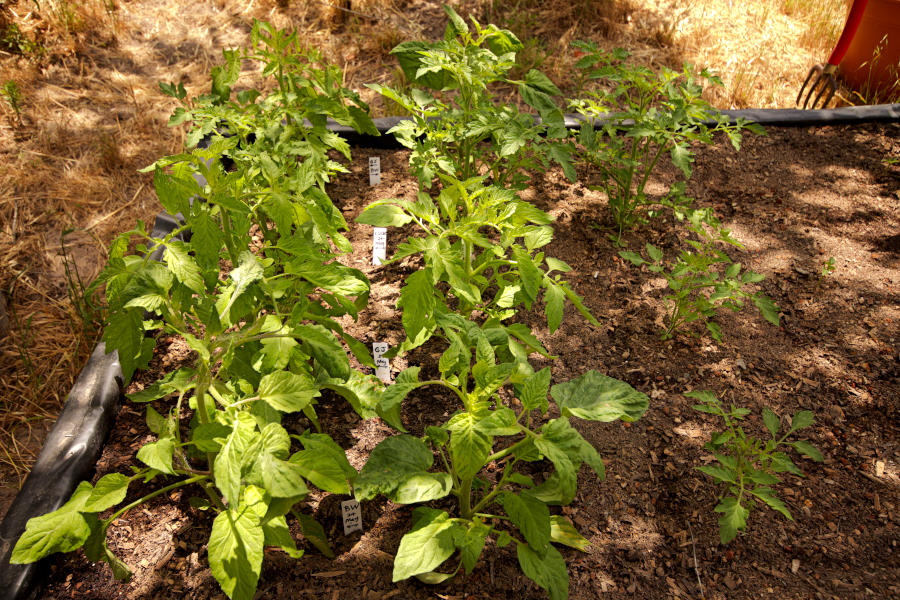
We had a substantial surplus of tomato seedlings that we could not plant all at once because we were still constructing raised beds and filling 20 gallon pots with dirt over the course of May. Consequently, we ended up transplanting several additional tomato plants (Edox, Big Beef, Brandywine and German Johnson) about a month after the main crop. All of these were less than 12” tall at the end of June but now their growth is exploding. We also bought two San Marzano starters from a local garden center.
Tomato Trellis
As a rule, when the tomato plants in our 4’x8’ raised beds reach 18” tall, we tie them off to a trellis, which I’ll describe briefly. In hindsight, it would be better to tie them off at 14” to eliminate the risk of having them fall over in the wind or under their own weight.
We’ve set up trellis poles by fastening lengths of 1-¼” x 1-½” douglas fir (sawn lengthwise from 2×4”s) to the ends of our raised bed boxes. Then we ran ¼” cord lengthwise above the plants at heights of 18”, 24”, 32” above the soil, and so on at 8” intervals, through holes in the trellis poles. We used either tomato twine, tomato tape, or strips of rag cloth to tie the main stems of the tomato plants to the trellis cords. For tomato plants in 20 gallon pots we are using both diy tomato cages and commercial tomto cages.
Tomato Flowering
How our tomato plants are flowering right now corresponds to their height. The Sebastopol, tallest of all, is leading the other varieties by showing several open flowers, Next in stature, the Big Beefs and Brandywines all have fully developed flower buds but very few that are open. The Edox and German Johnsons, lagging behind, have both small and fully developed flower buds, with none open yet. The San Marzanos, shortest of all, only have small flower buds so far.
Note About Our Raised Beds
I will publish an additional post to describe our raised beds in detail. Briefly, each bed consists of a plywood box. Each box has four sides with the bottom securely covered by gopher wire, fastened along the edges with fence staples. Gopher wire is a variant of chicken wire. Each of the four sides is made from a 16” wide CDX ⅜” plywood panel, either 4’ or 8’ long., with 2×2” stringers (1-¼” x 1-½” douglas fir) glued and screwed along all edges. The 4’ short ends are screwed to the 8’ long sides with special deck screws. Only the ground contact stringers are CA (copper azole) treated douglas fir. The others are regular, untreted, kiln dried douglas fir.
(Douglas fir is the preferred species of wood for house construction on the West Coast.)
The inside walls of each box are lined with 4 mil black plastic mulching sheet, stapled to the plywood, with several inches of extra width on the top and bottom. Each planter holds about 1-½ cubic yards of garden soil. We now have five of these raised beds. All fully planted.
Notes About the Soil
We ordered a load of garden soil enriched with compost, fertilizer and other additives which I will also describe in a separate post. We conducted a quick diy analysis of the soil and found that it was about ½ sand by volume, about ¼ fine organic material with some very fine clay sediment of less than 1/20th. The remainder was very fine to coarse wood chips that were well rotted and composted. The coarsest wood chips were about ⅛” in cross section. The finest were what you’d expect for garden dirt. The diy nutrient analysis for N-P-K and pH revealed that the soil was slightly acidic with N-P-K levels that were just adequate.
Fertilizing with Fish Emulsion
So far, our overall garden growth has been excellent.
We’ve fertilized our garden twice with a diluted liquid fertilizer, Agrothrive General Purpose Liquid Fertilizer ($60 for 2.5 gallons of concentrate). This product is made from fermented fish by-products and corn steep liquor, a by-product of corn processing. Its N-P-K assay is 3-3-2. The recommended dilution is 1:64 for seedlings and 1:32 for mature crops. It’s meant to be applied just before watering. I also learned from the Agrothrive online cheat sheet that you’re meant to soak the soil to a depth of 1 to 2 inches with the diluted mixture. The only word on how much to apply per area of garden is the recommended dosage for drip irrigation of 6 oz of a 50:50 dilution per 100 square feet.
We manually apply about ten times that dosage, but only once every three weeks.
We used a 20:1 dilution that has worked very well. We diluted one quart (32 oz) of the concentrate by adding water to fill a 5 gallon bucket, yielding about 6 oz of concentrate per gallon. We then used small plastic containers to apply about one cup of the dilute mixture around the base of the stems of our crops. As a result, we ended up applying 5 gallons of the dilute mixture to 100 square feet of garden. In other words, 32 oz of concentrate per 100 square feet. We watered the garden with at least 7.5 gallons per 100 square feet immediately after applying the fertilizer. Incidentally, we water our garden with at least 7.5 gallons per 100 square feet every day on hot sunny days, or every other day during overcast, cooler weather. Our vegetable garden is approximately 225 square feet in total.
Our garden’s yield of lettuce, courgettes and radishes has been excellent, while the immature corn, cauliflower, beans, potatoes and a few tomato varieties have all shown explosive growth.
Other Crops
Here’s a list of all our other crops. Stay tuned for more updates!